
Get Started with Ski Touring: The Essentials of Ski Touring Gear
Posted by Bryan on 2022 Jan 28th
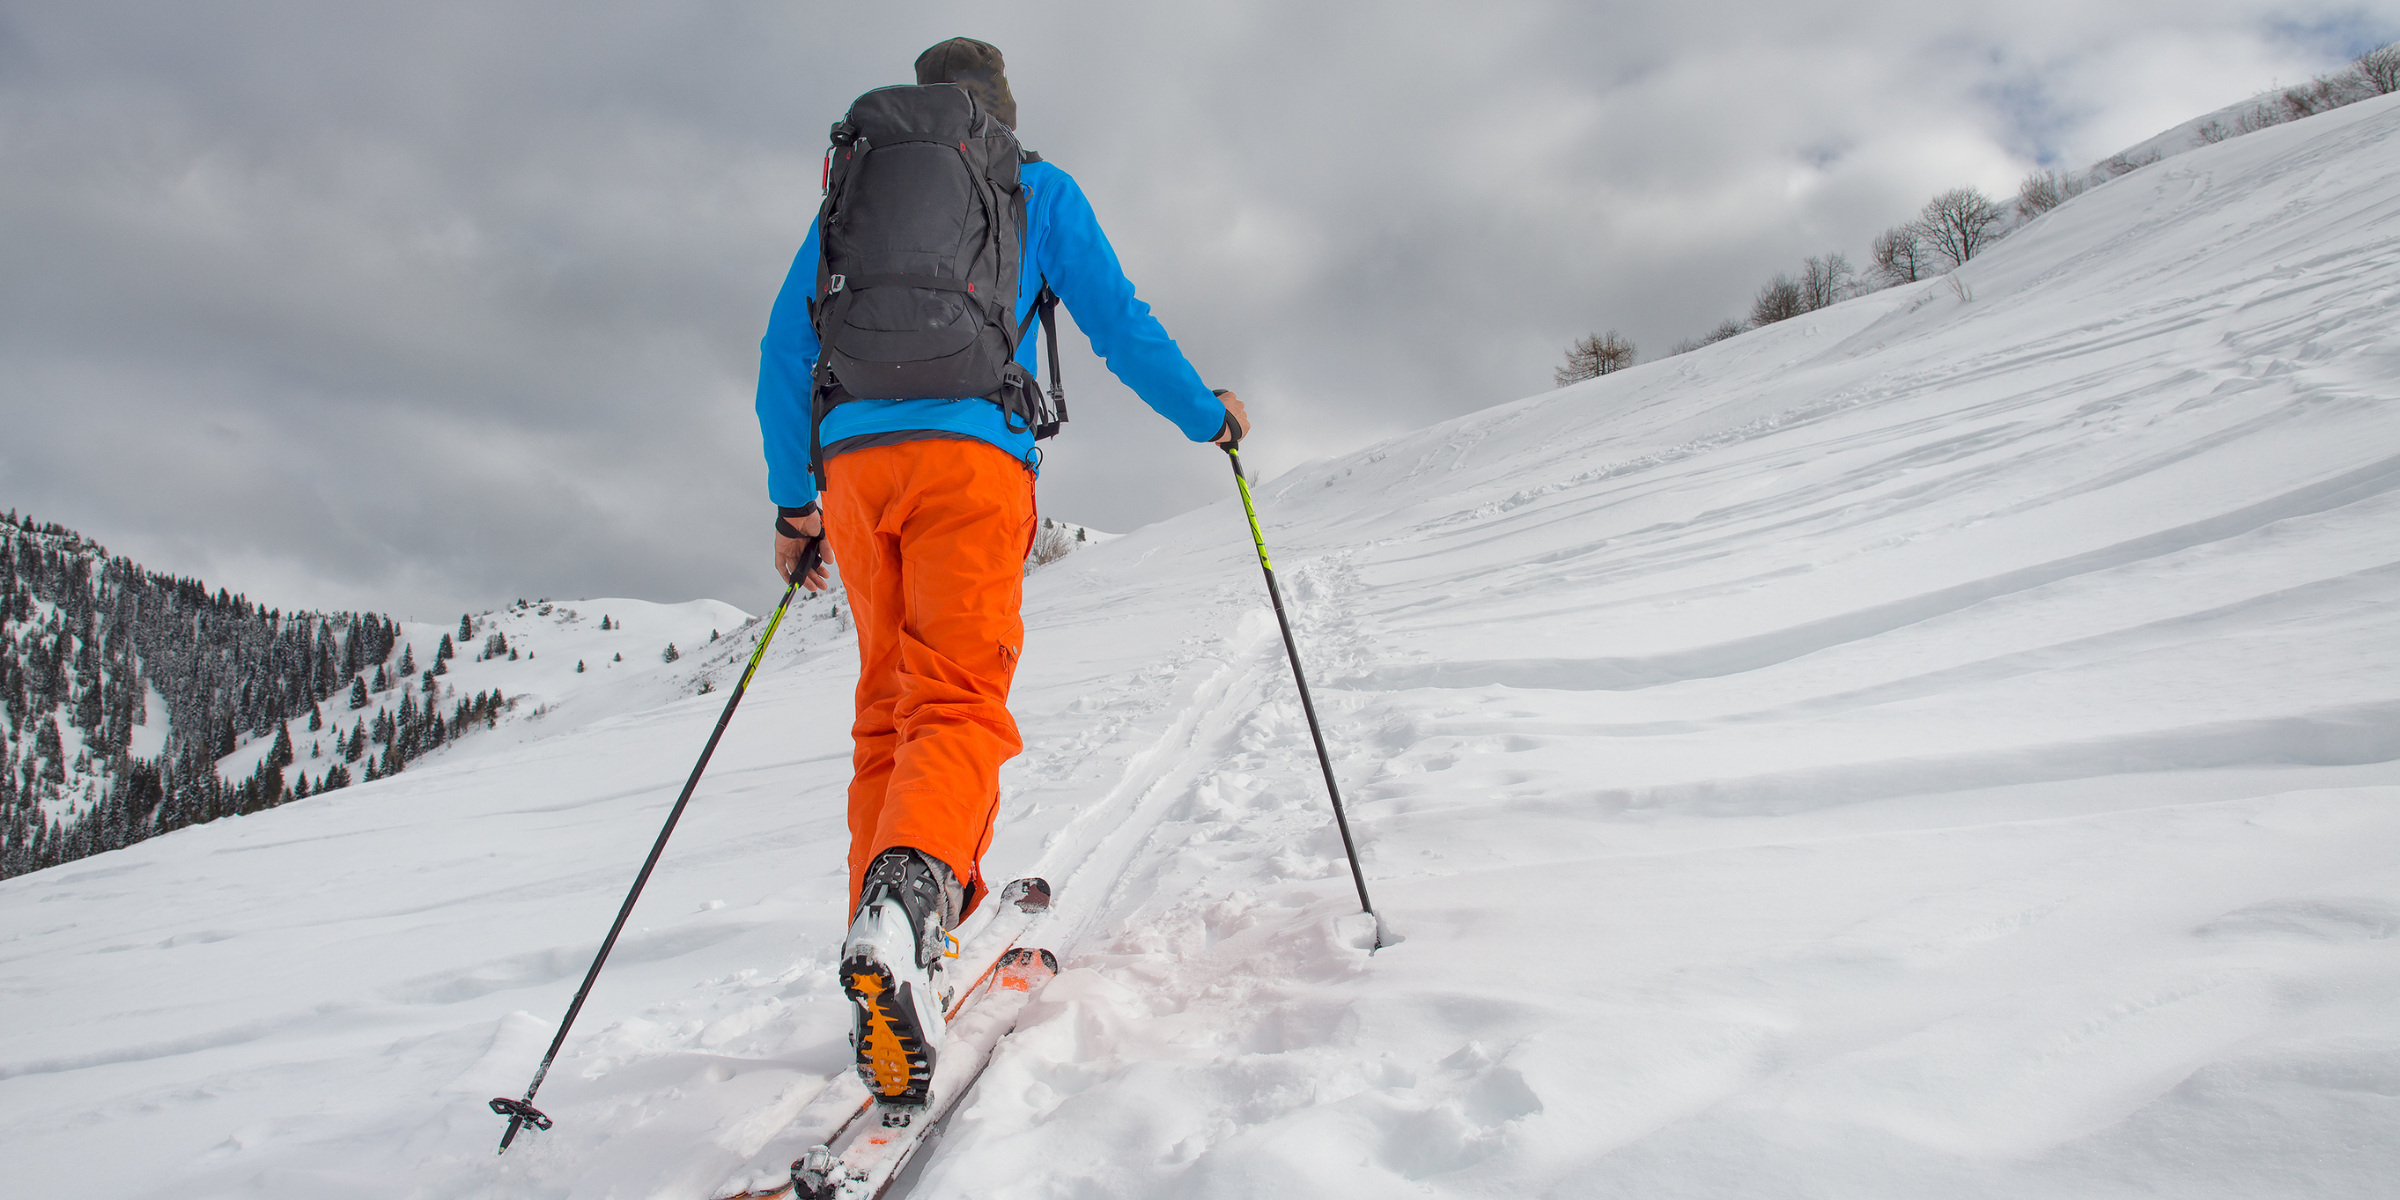
Ski touring is a great way to get out and enjoy the wild places in your backyard and beyond in the winter, but what exactly is it?
According to Wikipedia, “Ski touring is skiing in the backcountry on unmarked or unpatrolled areas. Touring is typically done off-piste and outside of ski resorts, and may extend over a period of more than one day. It is similar to backcountry skiing but excludes the use of a ski lift or transport.”
Ski touring or Alpine touring, (AT for short), Ski Mountaineering, (Skimo), and randonnée are the many terms for it. The fun part about it is that it involves skiing downhill on natural snow. Of course, you have to go uphill to get there. Other compelling reasons are: you don’t need a lift, lower carbon footprint, it’s cheaper, spending time in wild places with close friends, no crowds and exercise.
Skiing uphill requires the use of skins, named after animal skins with the fur facing backwards and attached to the bottom of the skis. This enables glide forward and traction backwards. Much like the fish scales or kick wax functions on nordic skis. Today, they are made from nylon and or mohair and are stuck with removable glue to the bottom of the ski. This style of moving through the winter landscape was likely invented in either Northwestern China/Mongolia, or Norway but the Norwegians are known to have perfected and modernized the sport with modular bindings and boots.
There are 3 main areas where you can go ski touring.
- Ski areas, or in bounds
- Gladed or established areas without lifts or ski patrols outside of ski area boundaries.
- These areas are sometimes developed next to ski areas or are accessible through a ski area, (called side country).
- The backcountry or wilderness.
- Some ski areas offer this option for free, but most charge a nominal fee and have special uphill travel routes. It’s a great way to get some exercise in while your kids are in lessons or racing. The downhill portion is just like any other day at a lift served area, just ski down the trails or glades.
Going into the backcountry or established gladed areas are a whole other level. You need to have a bit more gear and knowledge for travelling in the wild in winter.
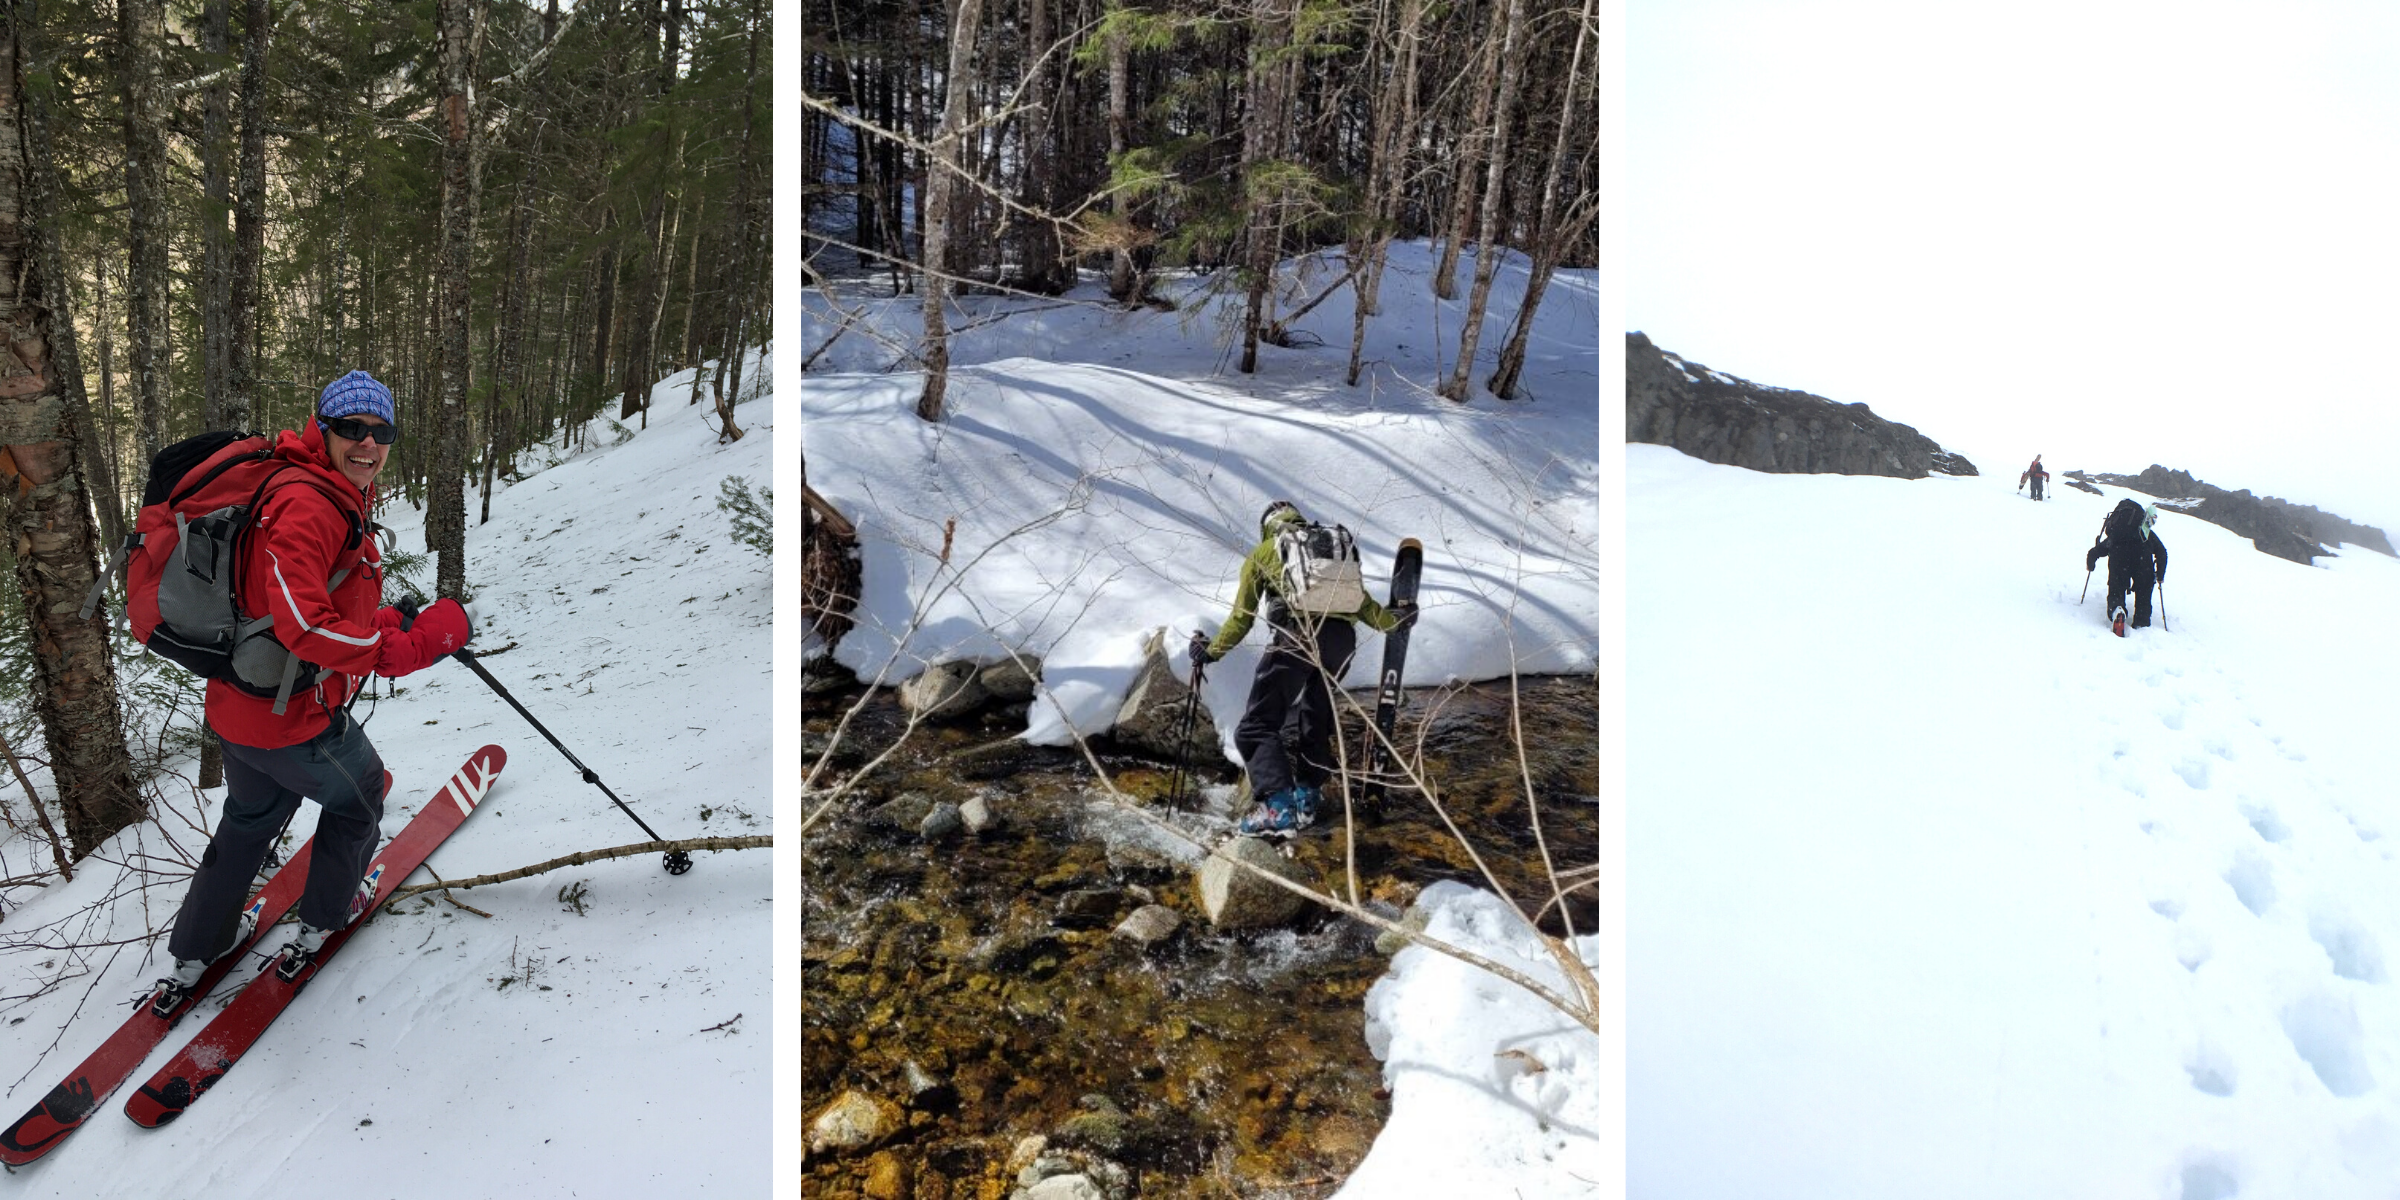
Photo above: Backcountry Ski Touring is best done with a buddy - for safety, and fun times.
SAFETY FIRST
The biggest consideration for backcountry travel is avalanche, (avy), and First Aid safety.
Avalanches can happen on any slope or area above you that is greater than 25°. Although it’s less likely on a gladed run or in the woods, I’ve seen it happen in Vermont in a wooded gully big enough to carry a person with wet snow, and that’s what we have here in New Brunswick too.
Anyone thinking of ski touring in the wilderness, local New Brunswick gullies or even established backcountry runs should take at least an Avy 1 course, (an Intro to Avalanche Avoidance and Safety), offered through avalanche.ca in Canada. Because we are close to the US here in New Brunswick, there are many course offerings in the White Mountains of New Hampshire as well. Avalanche.org is the US portal for info and education.
Taking these courses is really important for lowering your risk in the backcountry. It is also a great way to meet new friends to go with from different regions. Often these classes lead to further avy education opportunities all the way up to being certified as a guide, if you choose. Choosing a buddy for backcountry skiing can be a fussy and awkward thing too. It is best to find a buddy with similar goals, and risk tolerance. Discussing the planned route and objectives beforehand is a great way to avoid arguments or surprises in the field.
If you are only going to be doing laps at your local lift serviced hill, you don’t really need any safety gear besides a cell phone and a buddy if you go in the trees.
It is outside the ski area boundaries where you will really need to get some essential safety gear and the knowledge as to how to use them.
The 3 Safety essentials
- Avy beacon
- Avy probe
- Collapsable shovel
Beacons send and receive signals and are strapped onto your body, not put in pockets or packs. You wear them on your body because sometimes in slides, your pack will come off and then your rescue team will find your pack, not you. You don’t want it in a pocket either because you may take your jacket off as you get all hot and messy skinning up the hill. All avy beacons today operate on the same frequency and you and your friends should get the one with the longest range you can, ~70meters. If you have the good one and your buddy has the cheaper one, it will take them longer to find you! A solid model is the Black Diamond Recon BT below. Get one and practice using it often.
Once you zero in on the burial area, the probe comes out. You use it to probe the snow until you feel a soft body. You should get an aluminum one as the carbon ones can break and are more expensive anyway. You want to get one on the longer end, like 300-320 cm because the shorter ones may not reach your friend if they are deep. The Black Diamond Quickdraw probe 320cm is a great one that deploys quickly and is durable.
Next is the shovel. An aluminum one with a decent sized blade works great. Resist the temptation to get the smallest, lightest one you can find because when you have to dig your friend out, you are going to have to dig fast and move a lot of snow. The Black Diamond Evac 7 is a great choice as it can change into a hoe form as well.
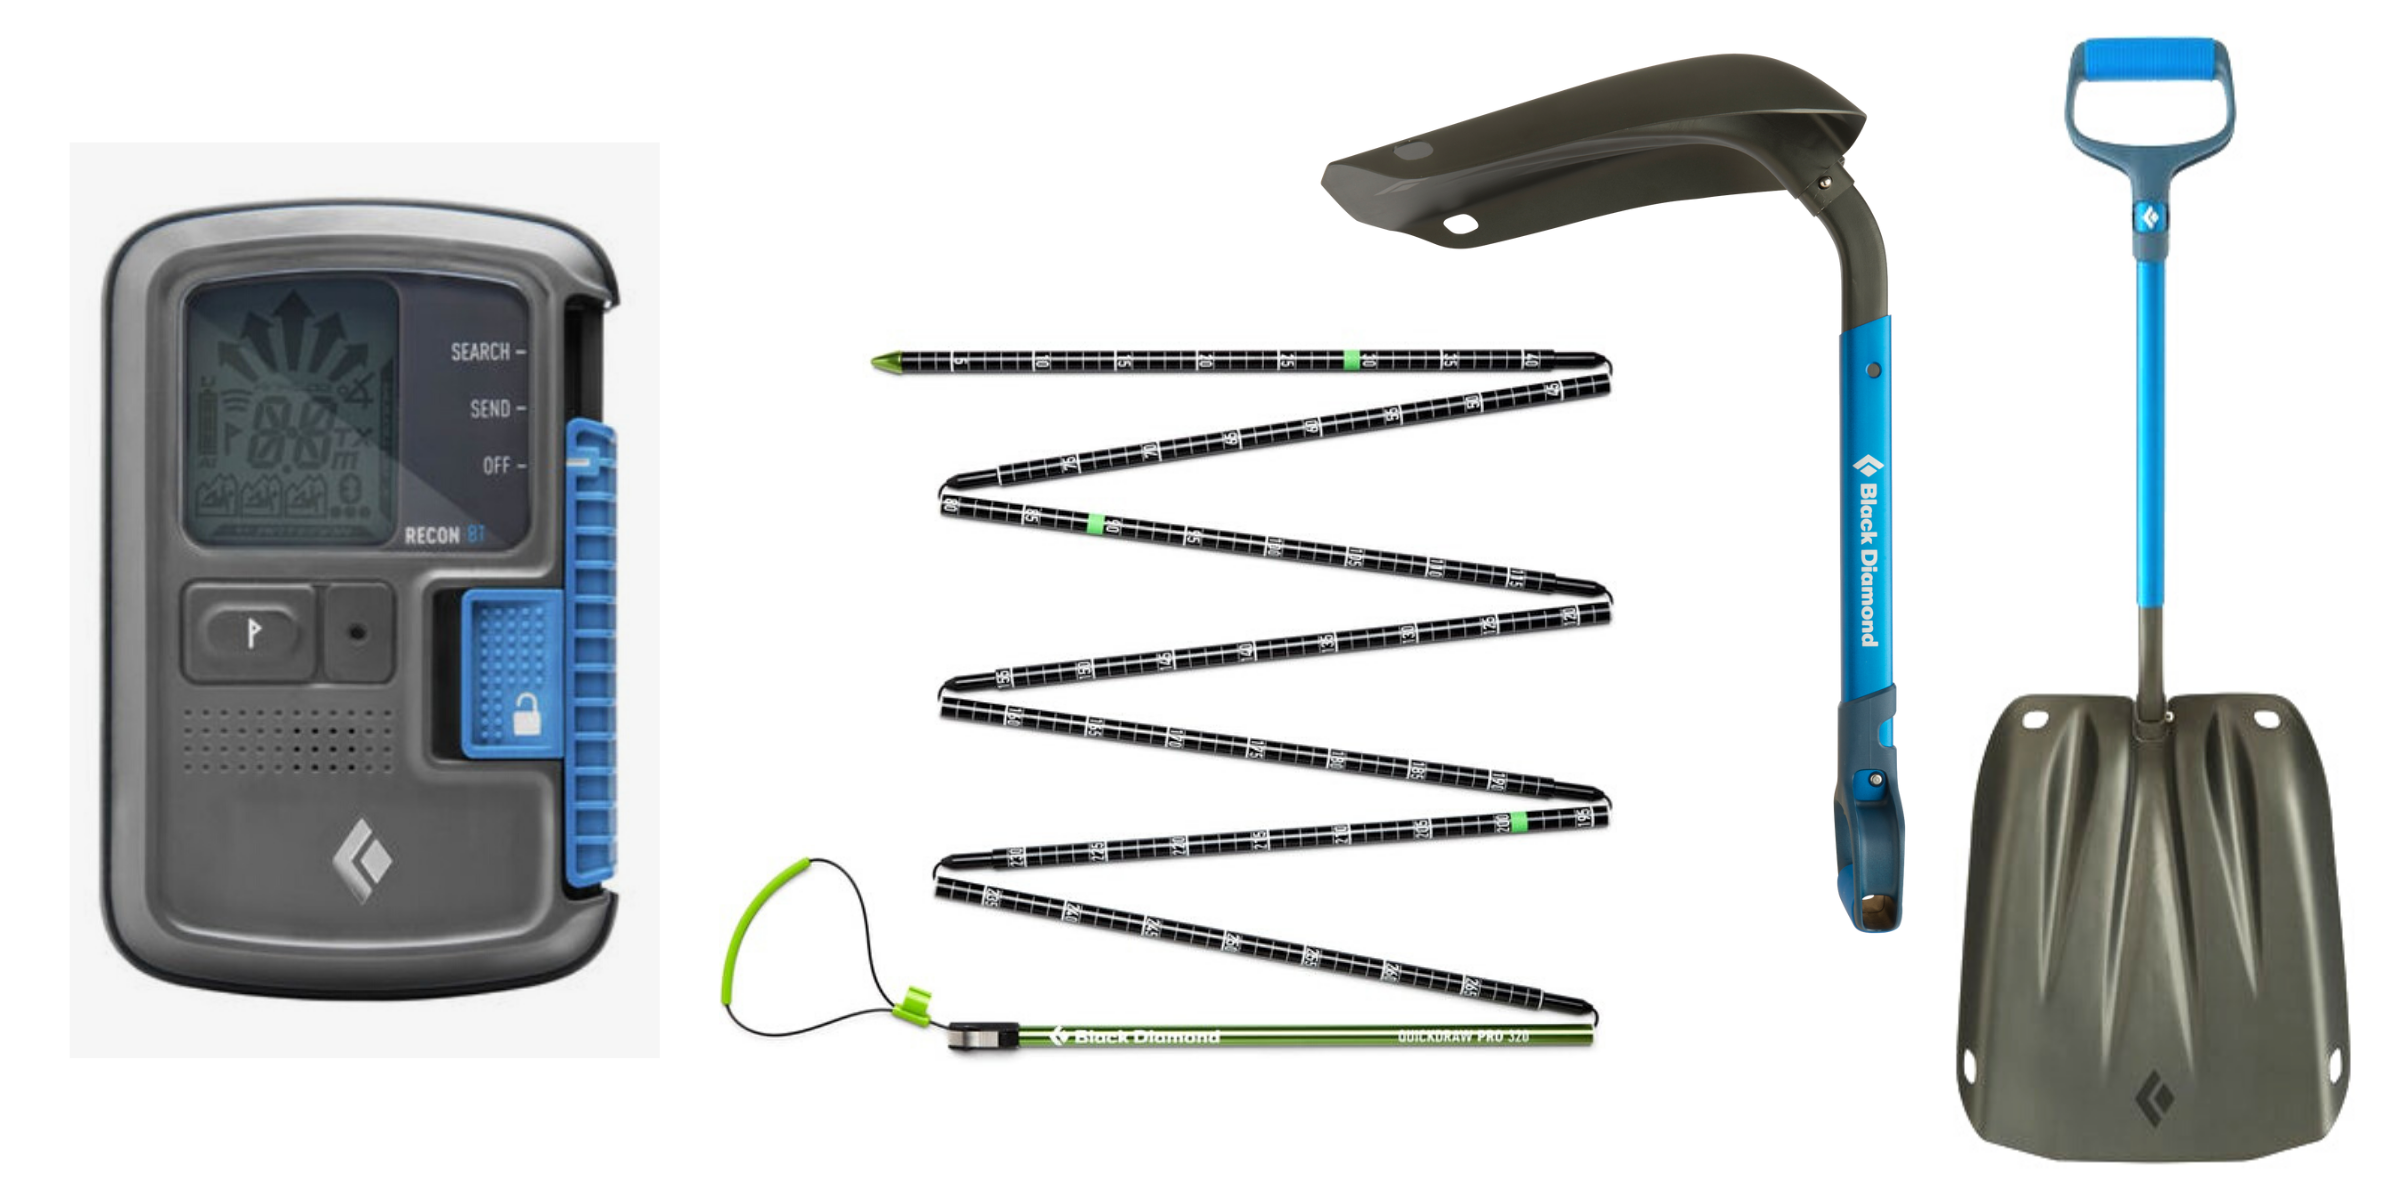
Photo Above: The Black Diamond Recon BT (Left), the Black Diamond Quickdraw Probe 320cm (Center), The Black Diamond Evac 7 (Right)
SKIS
The first question to ask yourself is: “Where will I ski tour the most and where will I want to go once I get all fired up?”
Luckily, it is possible, with the right binding, to get just one pair of skis to do everything. You may find that as you get more advanced and travel to backcountry ski destinations, you will want a quiver of different skis for special purposes.
For those just looking to do resort laps on piste or on the trails, a 75-90mm waist width will be fine. For general All Mountain conditions, an 84-105mm waist width will work.
For powder, deep snow and more aggressive freeride skiing, the 100-120+mm will be just jolly. Although, we must remember, we live on the East Coast where conditions are often hard, icy, manky and variable.
In any of the above categories, try to avoid the heavier ski options in those families. Generally speaking, an individual ski with up to a 106 width under 1800g is very light. Under 2100g is OK and above 2100 is getting heavy but still doable if you have the gumption and meaty hip flexors. Start where you are and refine from there as you figure out what you want.
For a do it all ski that is versatile and playful, it’s hard to beat the Salomon QST 98. For a quiver of one, it really hits the mark.
The Salomon MTN Explore 95 ski is an even lighter ski specifically made for this purpose and is worth checking out if you are more inclined to travel in more remote areas and plan to travel far.
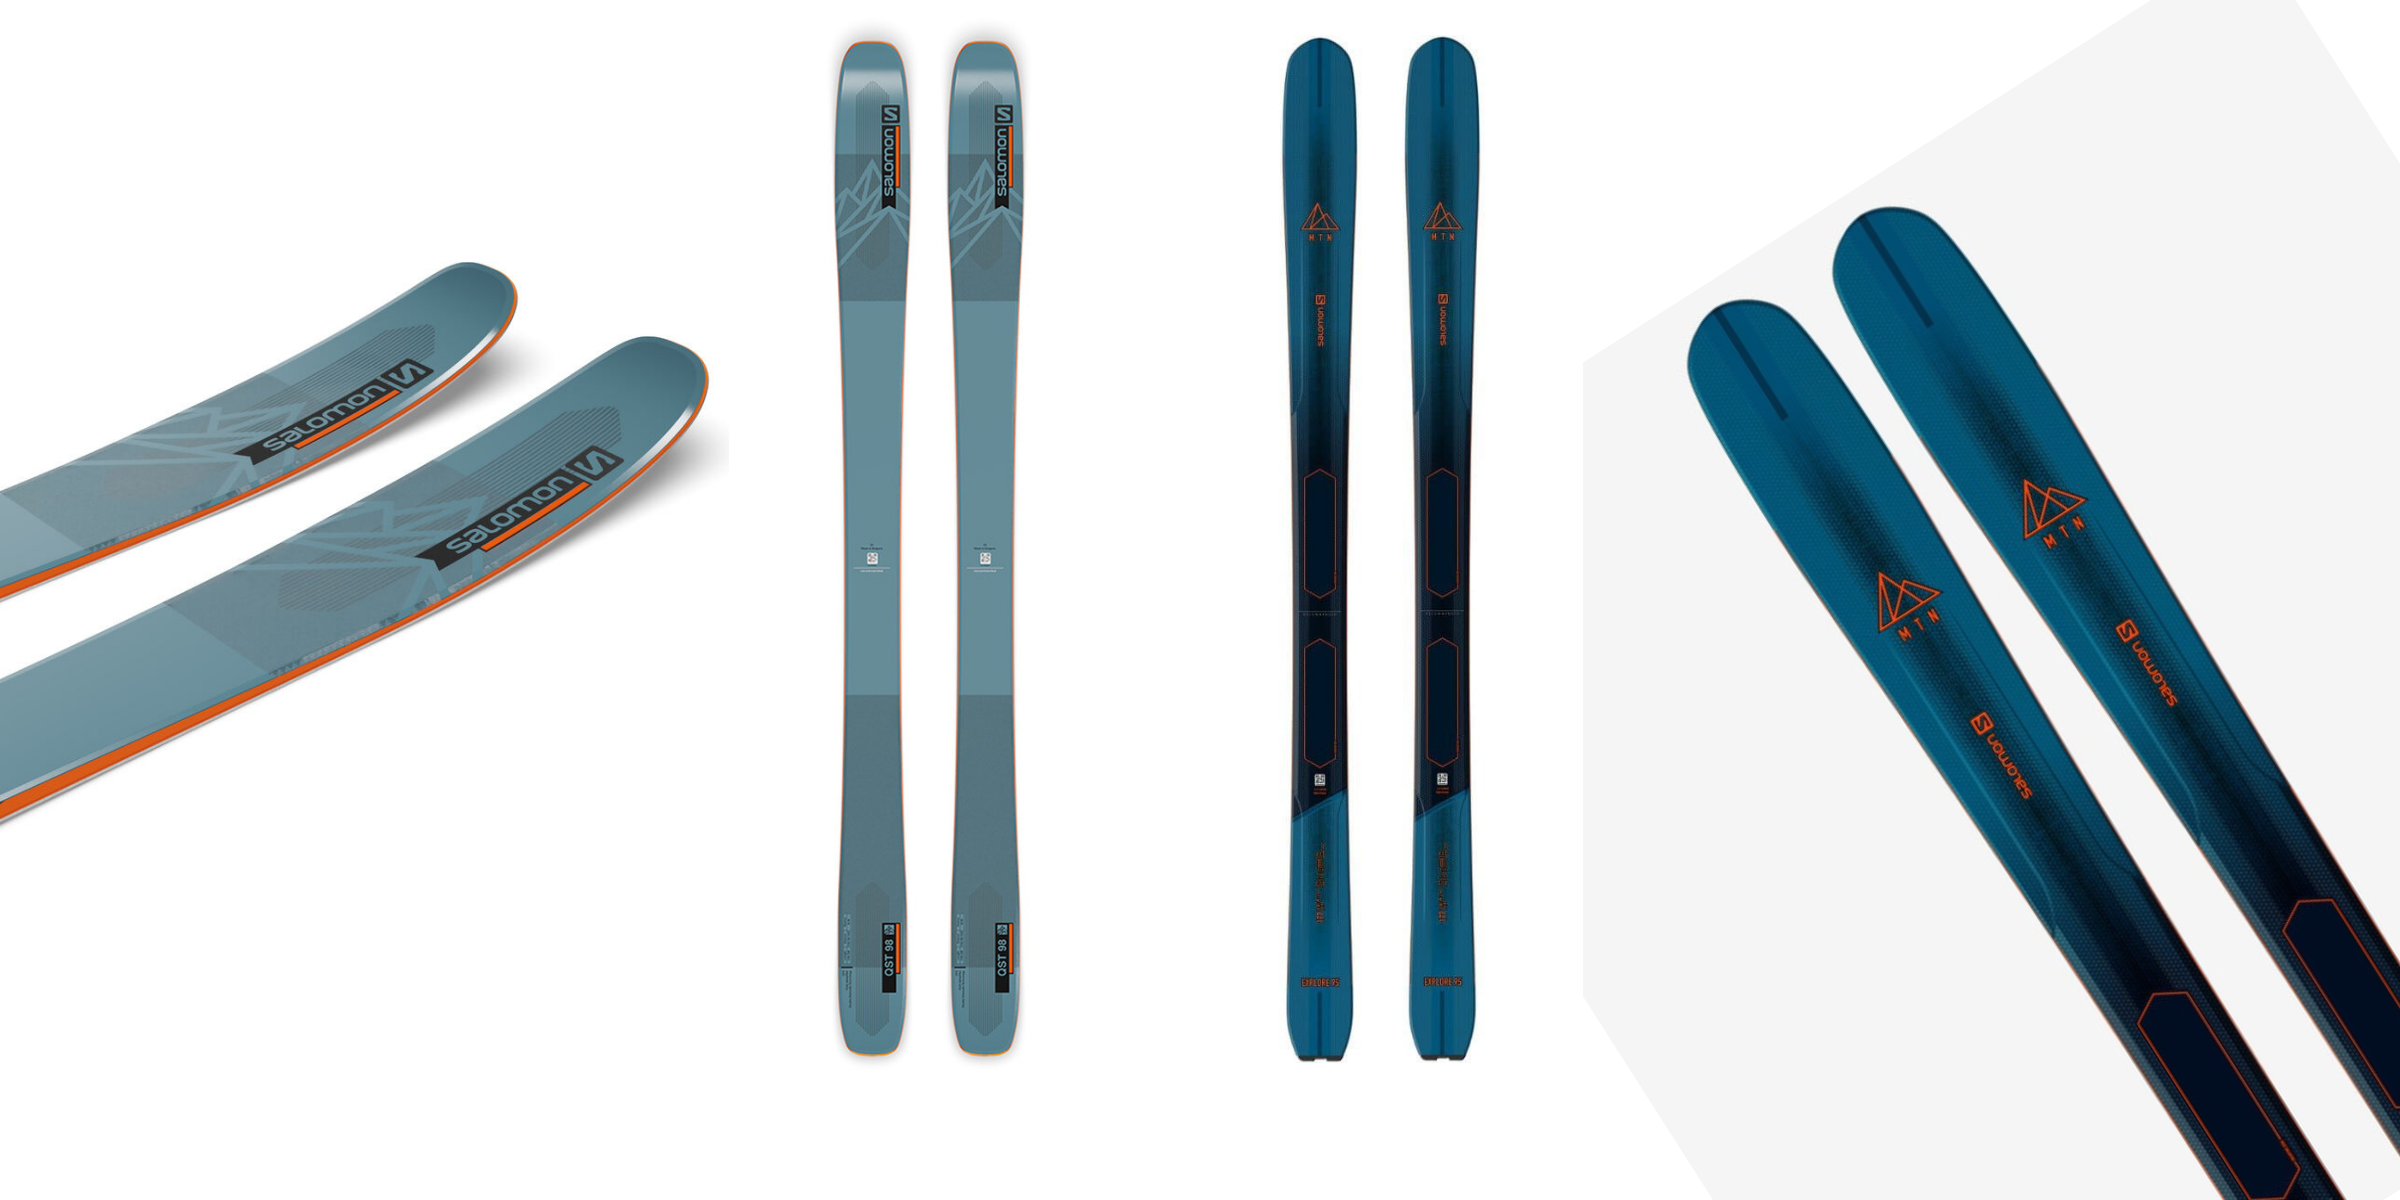
Photo above: Salomon QST 98 (Left) and Salomon MTN Explore 95 (Right)
BINDINGS
There are 3 main types of bindings with advantages and disadvantages to each.
- Frame bindings
- Tech or AT bindings
- Transformer bindings
Frame Bindings
Frame bindings, such as the Marker FreeTour EPF 12, can be used with regular boots. No special pin receivers are needed. This is a good binding to start with as it offers full toe and heel releasability, in case of a fall. They are not too expensive but are the heaviest of the three options.
Tech or AT Bindings
Tech or AT bindings, like the Black Diamond Helio 200LT, are by far the lightest of the bunch and best reserved for expert skiers. They are very efficient but do not release in a fall. BD and some companies say they release but it is not full 180° in the toe and heel. These require a touring boot with toe and heel inserts.
Transformer Bindings
Transformer bindings, (for lack of a better word), do everything pretty well. The Salomon Shift MNC 13 is the best example of this. They are about half the weight of frame bindings but about 4 times heavier than the AT bindings. They transform from a typical downhill binding into a touring binding with no loose parts. You need a touring boot with toe and heel inserts.
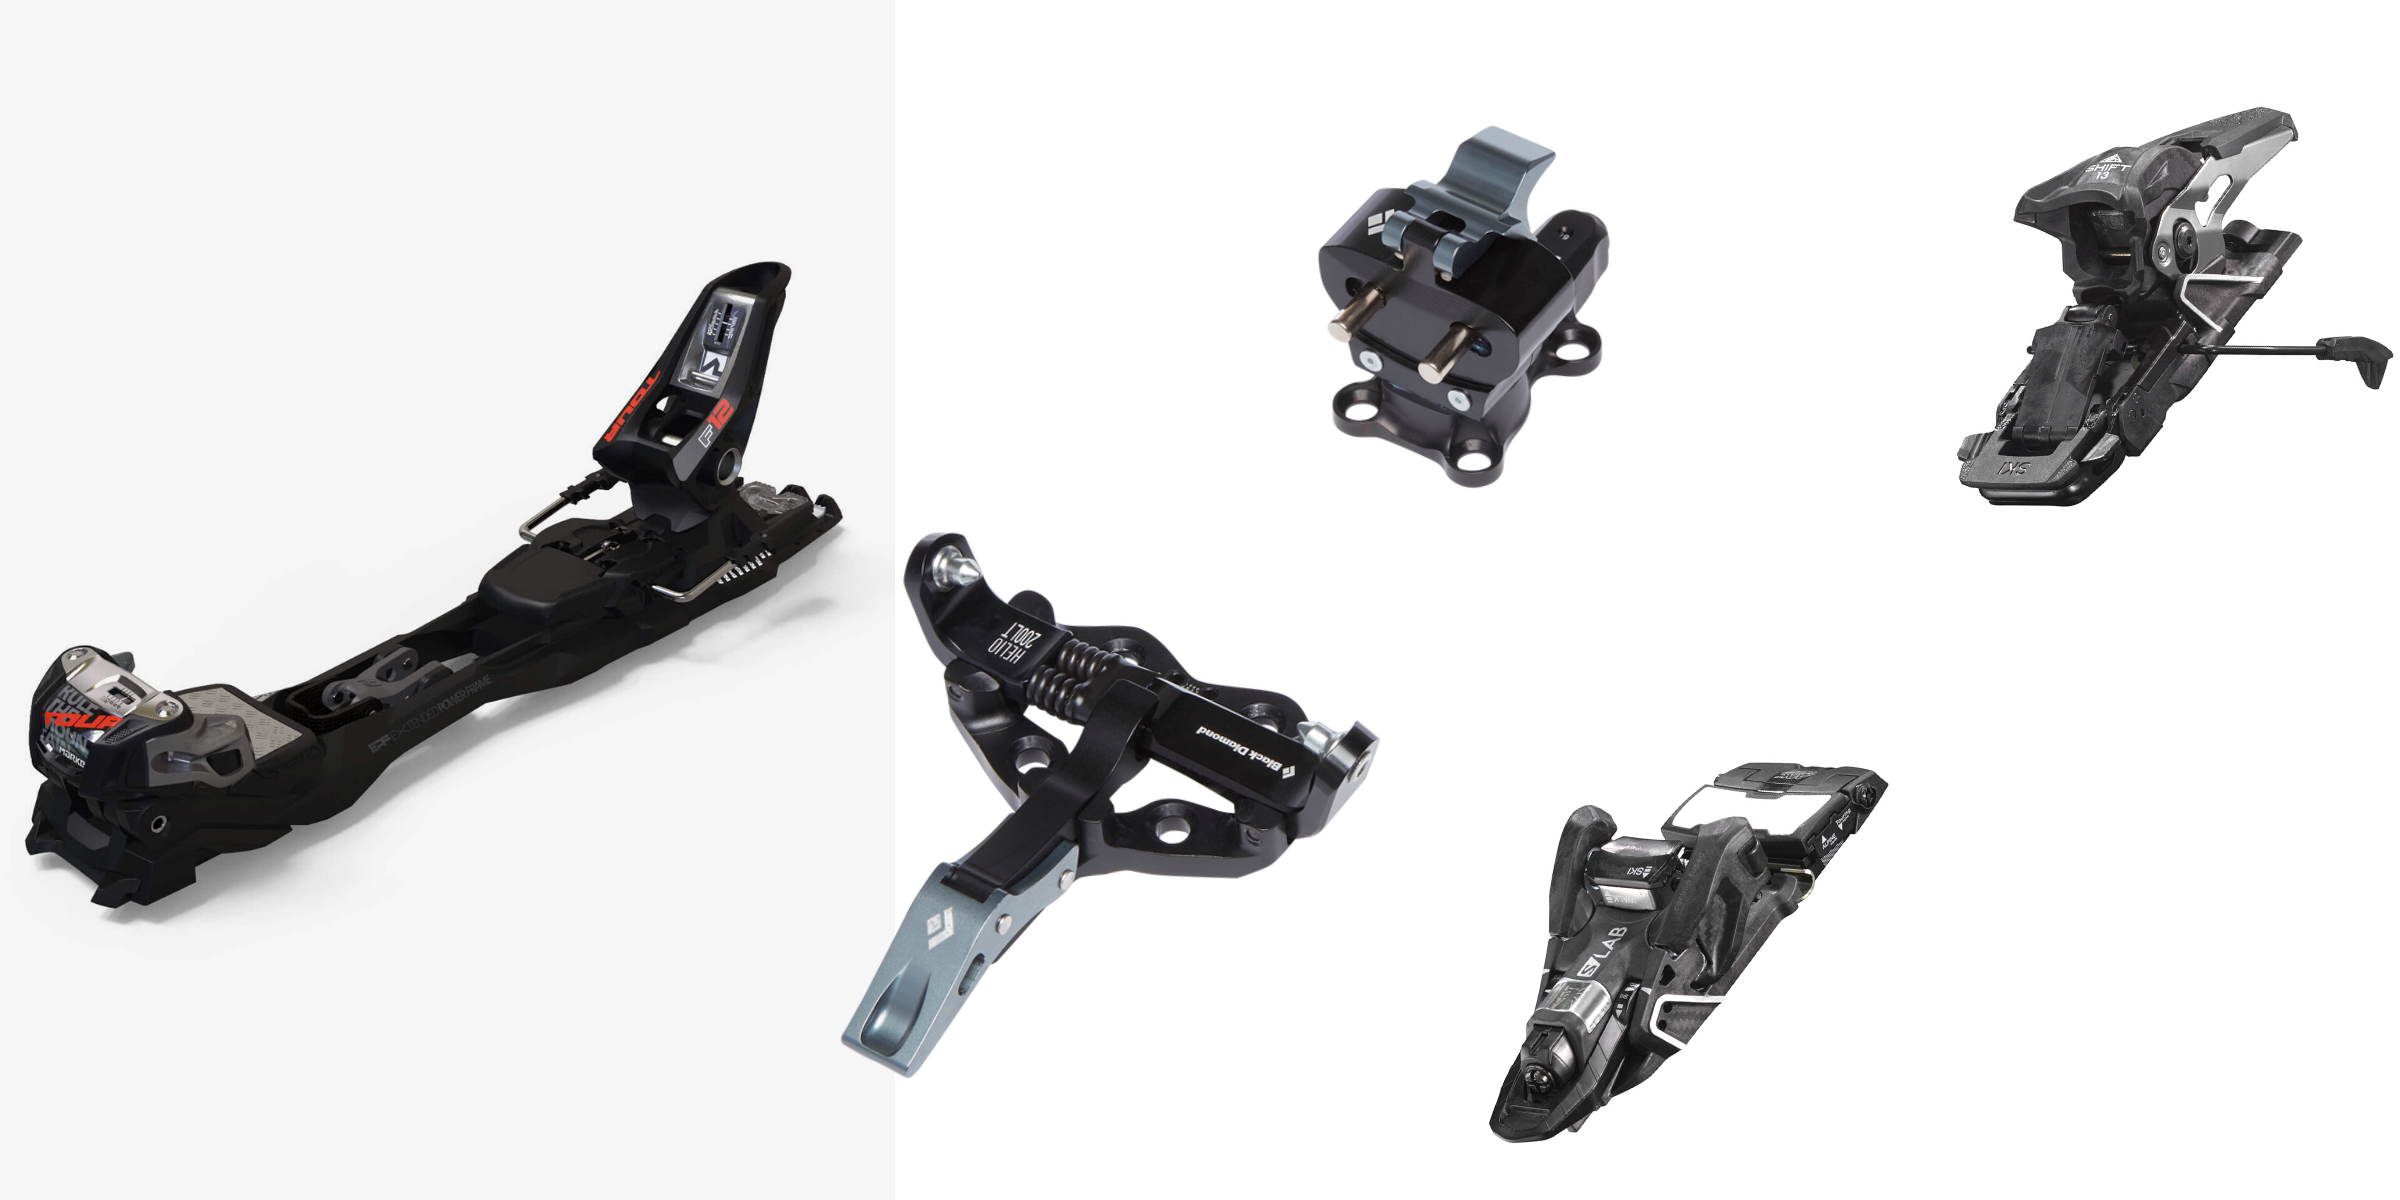
Photo above: Marker FreeTour EPF 12 (Left), Black Diamond Helio 200LT (Center), Salamon Shift MNC 13 (Right)
BOOTS
As far as ski boots go, any downhill boot can work with the frame bindings. With the Tech bindings you need the tech inserts on the toe and heel. With the Salomon Shift you only really need them on the toe but touring boots always come with inserts in the toe and the heel. This makes them more versatile.
Most touring boots have a touring or walk mode which lets the upper cuff flex while you skin up the mountain, while regular ski boots don’t.
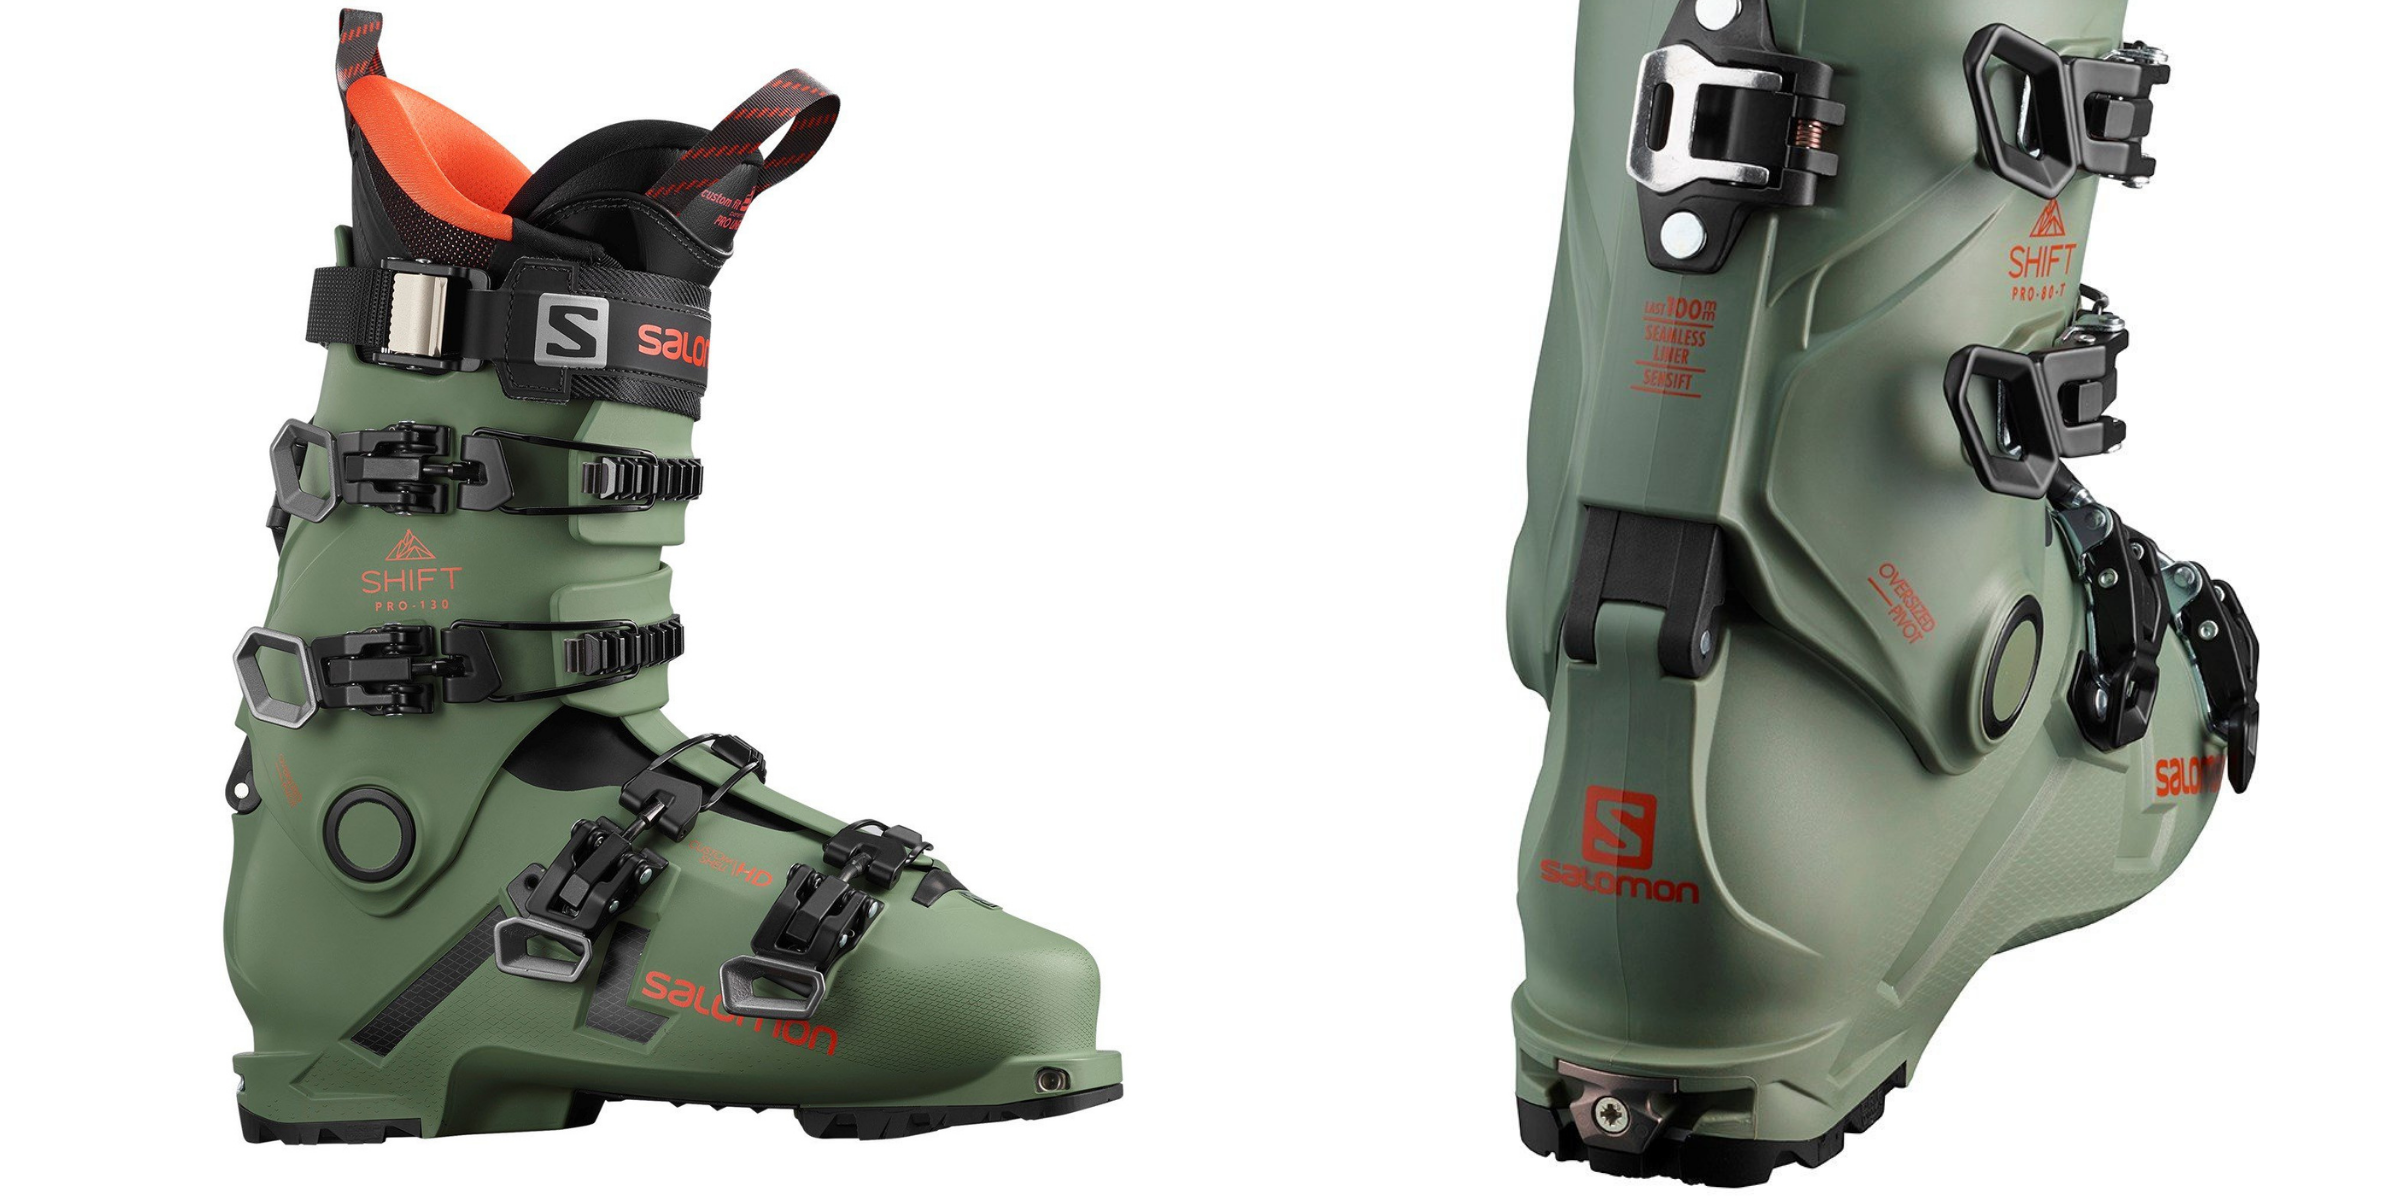
Photo above: Salomon Shift Pro 130
SKINS
Skins are adhesive fuzzy bits that stick to the bottom of your skis to give you traction on the up and a bit of glide on flat sections. Some are sized for specific lengths of skis while others need the tip and tail hardware installed at home to match the ski length. All of them need to be trimmed to the shape of the ski like the sidecut. This is something your local ski shop (us included) can do!
The types of Skins are:
- Nylon
- Nylon are durable and heavy and offer the least amount of glide and most grip.
- Mohair has the best glide, least grip and is the least durable and lightest. Skimo racers like these.
- The mixed ones are the best of both worlds. I find that the adhesive wears out before the fuzz if you take care of them. The Black Diamond GlideLite Mix are the best in terms of durability grip and glide.
Mohair
Mixed (nylon and mohair)
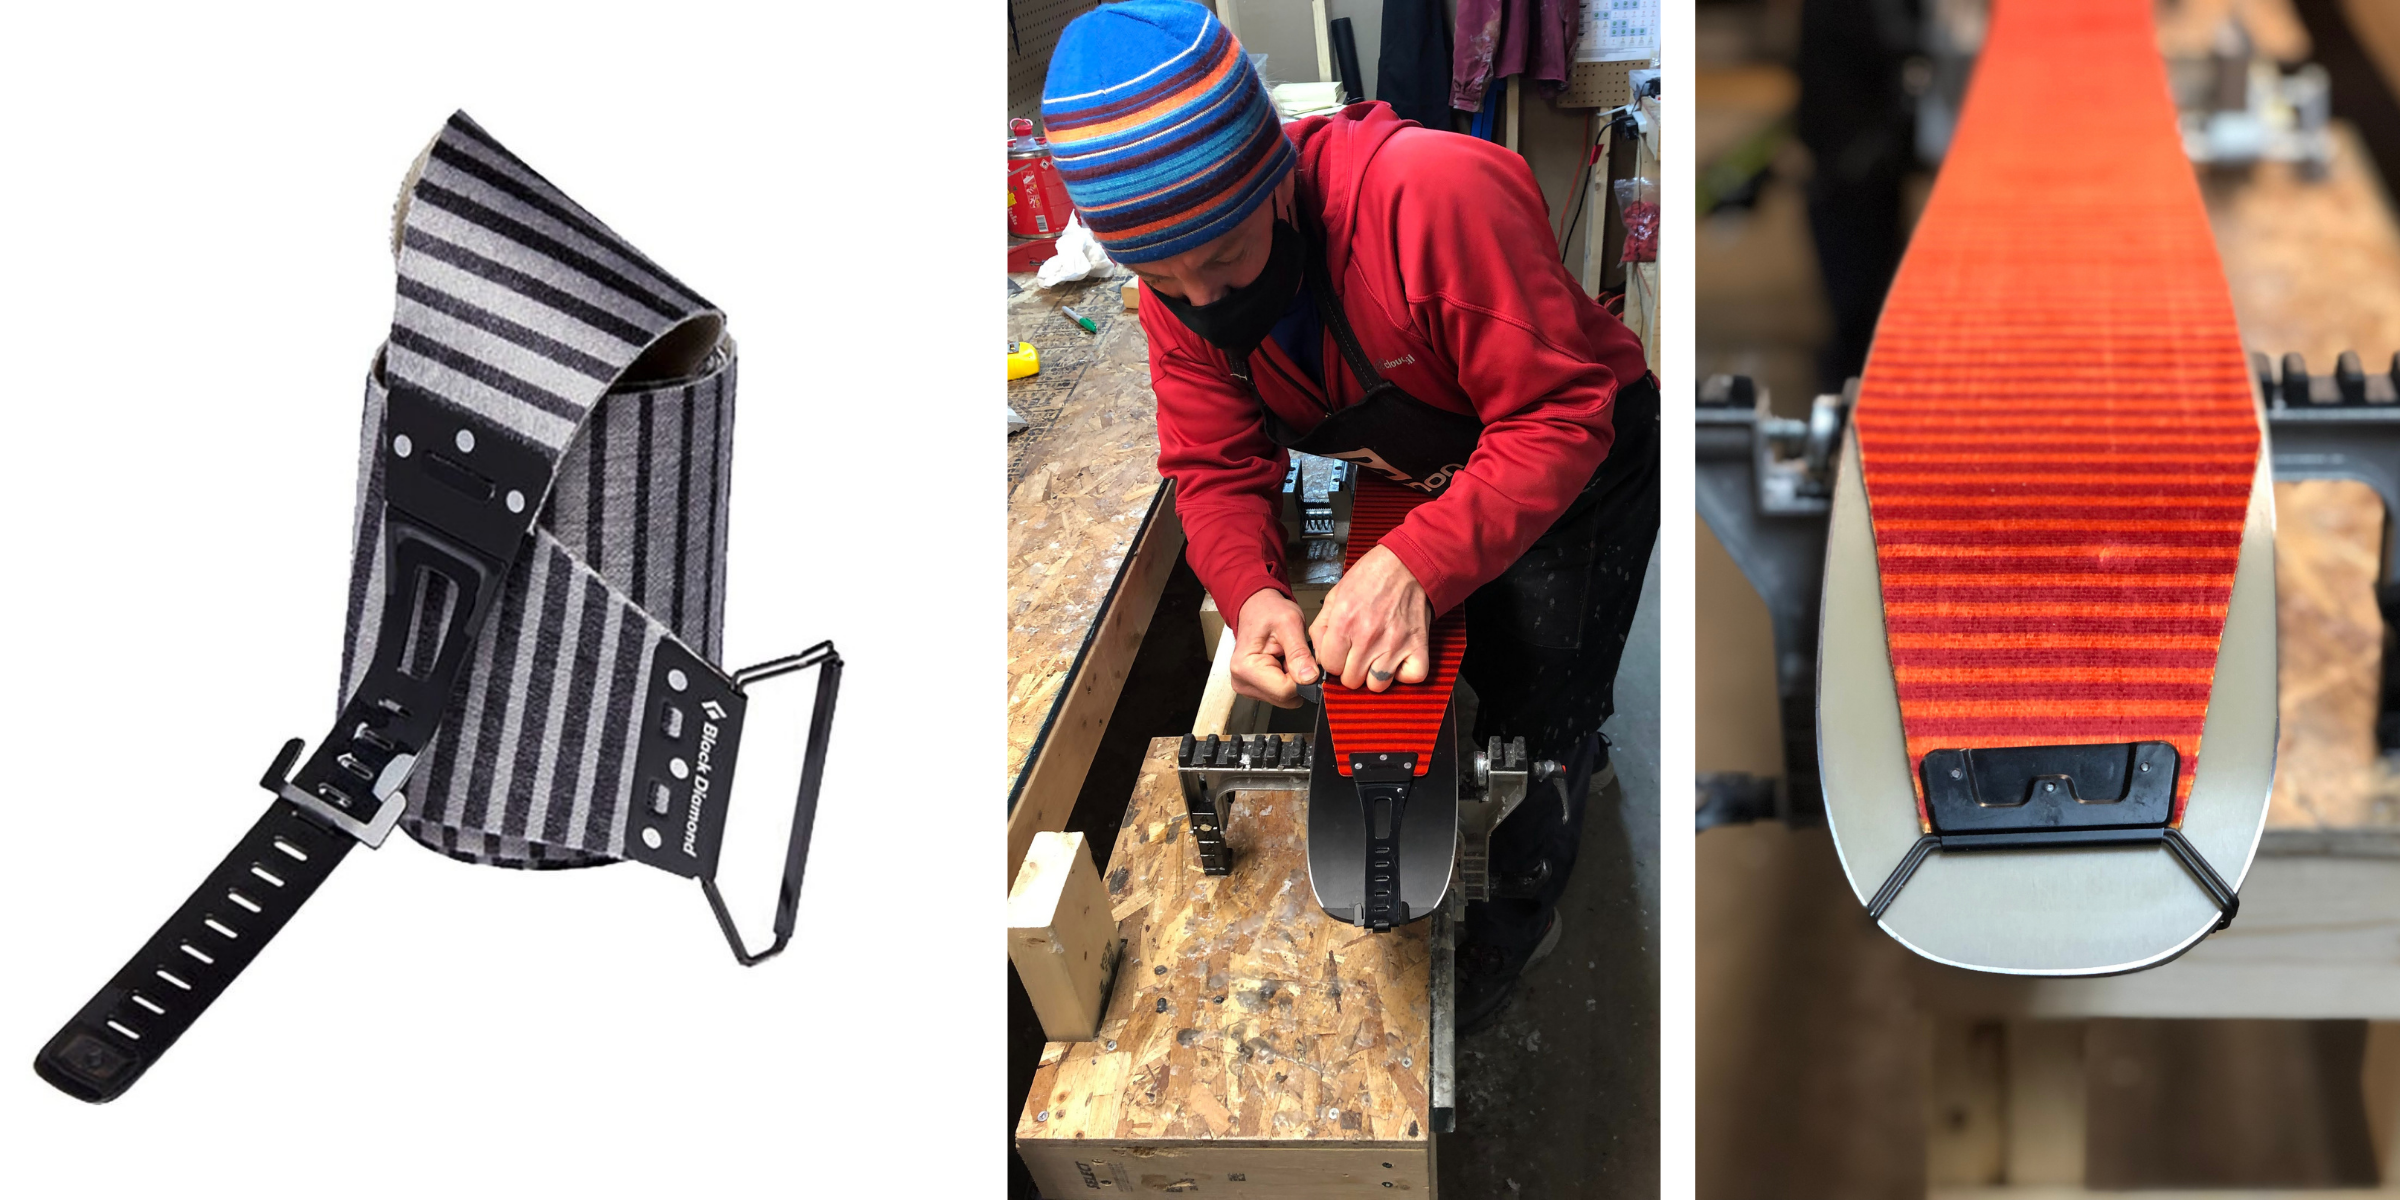
Photo above: Black Diamond GlideLite Mix (Left). Shawn Bethune, Ski Tech (Right) trimming Black Diamond Skins to fit our customer's skis.
POLES
Poles are an accessory where a few little details will make touring easier and more fun. Any ski pole can work but I find the adjustable length ones are great. Also, many touring poles have a little duckbill flabber on the tip of the handle which makes it much easier to flip and push your bindings into different modes without bending over, just like on the pole below.
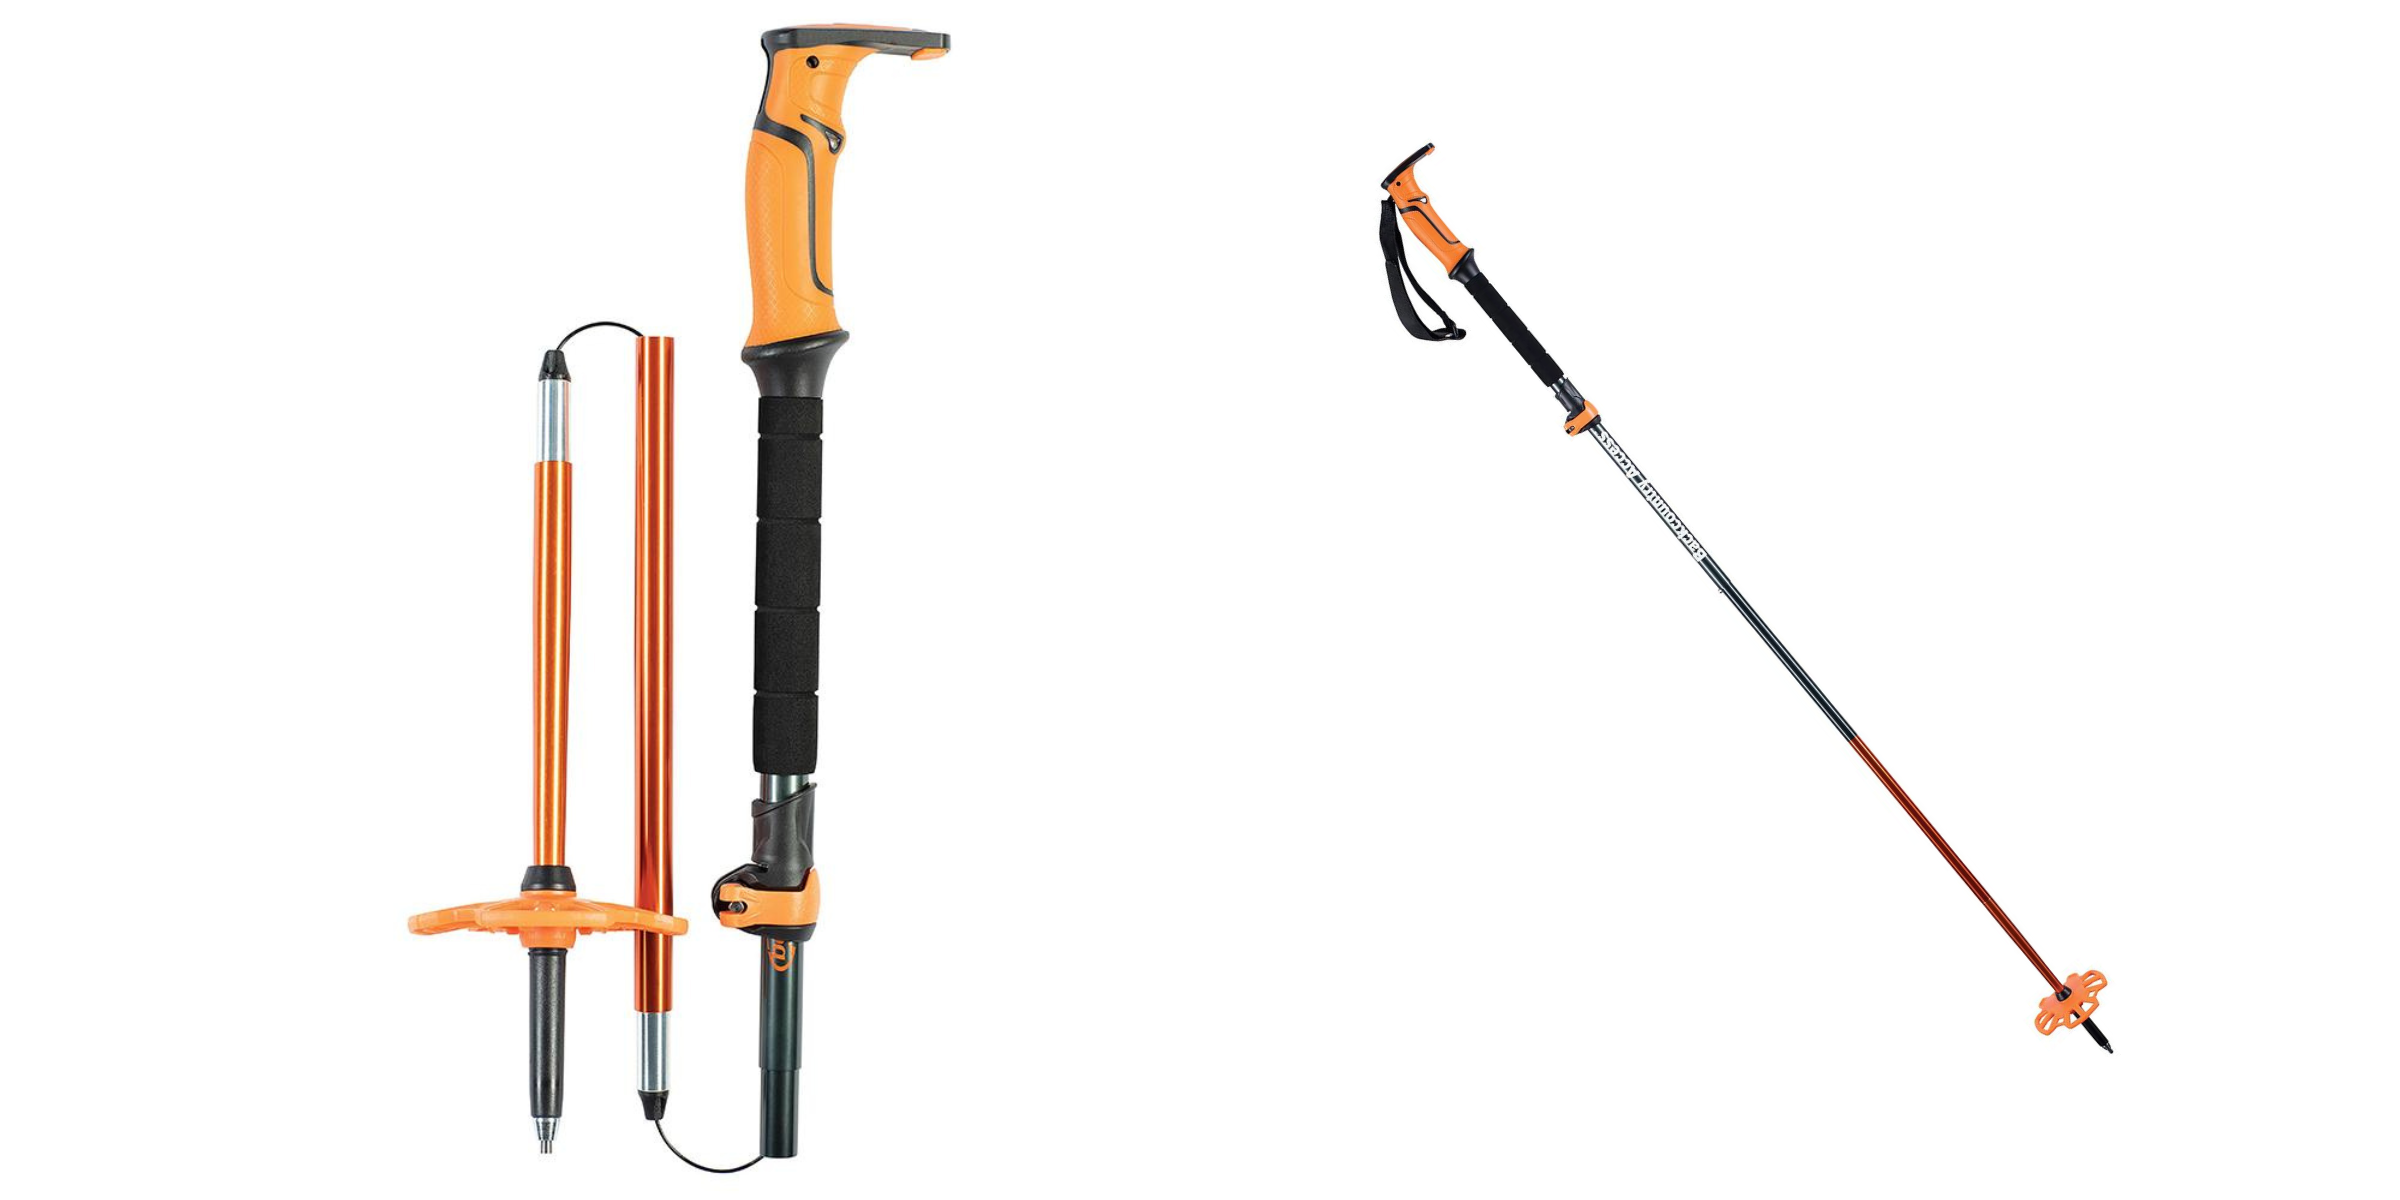
Photo above: Adjustable ski pole with 'a little duckbill flabber on the top of the handle'.
To sum it all up
Most people here in New Brunswick and the Maritimes are either going to their local resort for a few laps or going farther north to the Gaspé in Quebec, or the White Mountains in New Hampshire state side. All you really need are some hills or mountains and deep snow.
Any level of skier can jump right in. Ski touring at a resort with a buddy who has done it before is a great way to start, whether you are new to just the touring aspect or it’s your first time skiing altogether. At a resort, it is often safe to go by yourself. It’s the same as buying a ticket and skiing alone as long as you stay on the runs. Anytime you go off trail or into a glade, it’s a good idea to have a friend. Once you are able to ski in a variety of conditions, it will be easier, safer and less frustrating to enter the backcountry.

Photo above: Skip the Ski Lift lines and enjoy some wide open spaces, to yourself!